

Red Lentil & Tomato Flourless Crackers
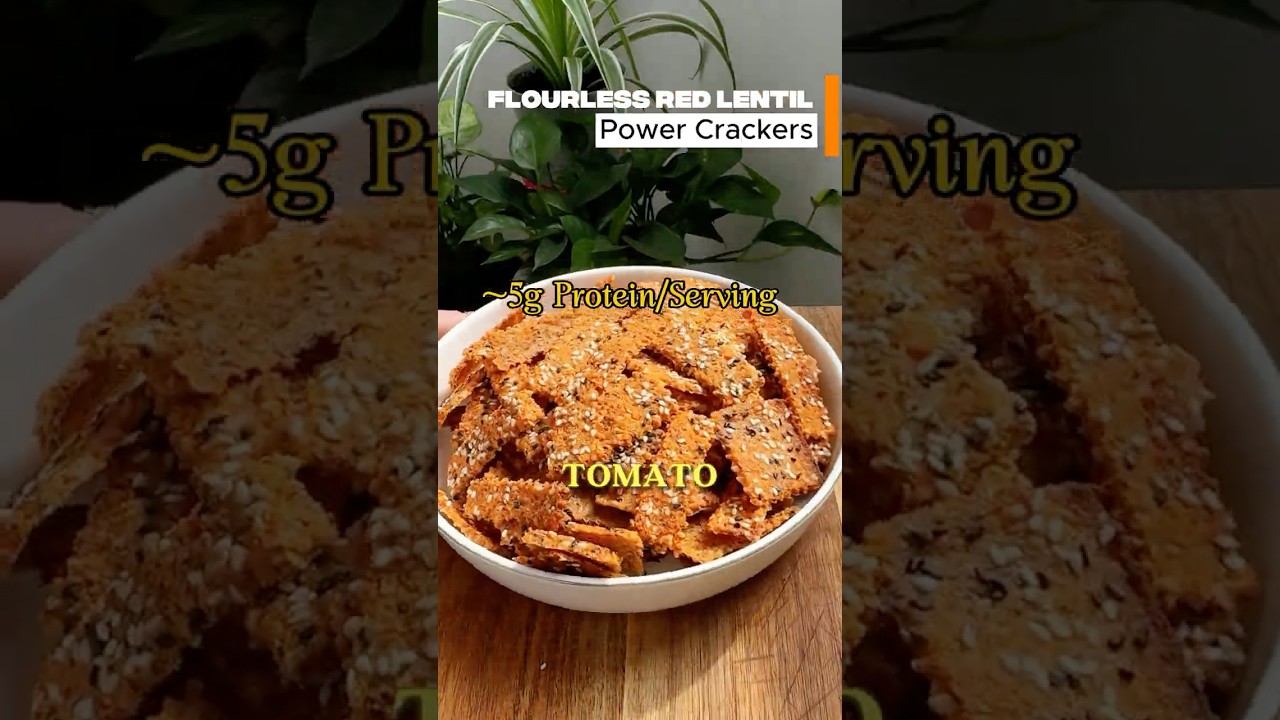
These crispy flourless red lentil crackers are a wholesome, high-protein snack made with soaked red lentils, fresh tomato, chia seeds, and hemp hearts. Naturally gluten-free and fully plant-based, they offer a deep umami flavor that develops further over time. The recipe involves soaking lentils, blending with fresh ingredients, resting the batter for optimal texture, and a two-stage baking process to achieve perfect crispness.
Instructions
- Place the red lentils in a large bowl and cover with plenty of cold water, about 3–4 times their volume, since they'll expand as they soak. Let them soak for 4–6 hours, or overnight for convenience. Once soaked, drain and rinse thoroughly under cold running water until the water runs mostly clear — this removes excess surface starch and keeps the final texture from turning gummy. Drain completely and let them sit in the strainer a few extra minutes; leftover water is the single biggest cause of a batter that's too loose to spread properly.
- Rinse the tomato and roughly chop it into large chunks.
- Add the soaked and drained lentils, chopped tomato, garlic cloves, and your chosen spices to a blender or food processor. Blend in short pulses, scraping down the sides as needed, until the mixture reaches a smooth, thick paste — or leave it with a bit of texture if you prefer a heartier bite. The consistency at this stage should be thick enough to mound on a spoon, not runny.
- Scrape the blended base into a large mixing bowl. Add the chia seeds, hemp hearts, sesame seeds, and olive oil, then stir with a spatula until everything is evenly distributed throughout the mixture. Make sure there are no dry pockets of seeds sitting on top or clumped at the bottom.
- Cover the bowl with a lid or plastic wrap and refrigerate for 2–3 hours. During this time the chia seeds absorb the surrounding moisture and swell, which naturally thickens the batter and gives it a firmer, easier-to-spread consistency. Skipping or shortening this rest is the main reason a batter fails to hold together once baked.
- Divide the batter between two parchment-lined baking trays, about 10 by 14 inches each, or lightly grease the trays if you're not using parchment. Spoon the rested batter onto each tray and spread it out evenly using the back of a spoon or an offset spatula. The ideal thickness is about the width of a coin — thin enough to crisp evenly, thick enough to hold together. Aim for that same thickness across the whole tray: a thinner spread bakes into crisper crackers throughout, while a thicker spread stays softer and chewier in the middle. Uneven spreading is the most common cause of some pieces burning while others stay underdone.
- Preheat the oven to 350°F (175°C) and bake the tray for 10 minutes. This short first bake firms up the surface just enough that the batter holds its shape when cut, without fully cooking through yet.
- Carefully remove the tray from the oven. While the batter is still warm and slightly soft, use a sharp knife or pizza cutter to score it into individual cracker shapes. Squares or rectangles are easiest to cut evenly and tend to bake more consistently than irregular shapes.
- Return the scored tray to the oven and continue baking for 20–25 minutes. Halfway through this bake, rotate the tray 180 degrees so it faces the opposite direction; ovens rarely heat perfectly evenly, and this rotation helps every cracker brown at a similar rate.
- Take the tray out and, using a spatula, carefully flip each cracker over. Lower the oven temperature to 325°F (160°C) and bake for another 5–10 minutes, watching closely toward the end. You're looking for the edges to turn lightly golden and firm to the touch.
- For an extra-crisp finish, turn the oven off completely once the bake is done, then slide the tray back in and prop the oven door open slightly with a wooden spoon handle for about 10 minutes. The residual heat continues to draw out moisture slowly without further browning the crackers, leaving them noticeably crunchier once fully cooled.
💡 Chef’s Notes
Video Tutorial
More Related Recipes

Red Lentil & Seed Flourless Crackers
7 High-Protein Flourless Cracker Recipes My 7 best high-protein, flourless cracker recipes—all…

Whole Wheat Tofu Paneer Mushroom Momos
Master the art of Nepali Momos with this high-protein, meal-prep-friendly recipe. This…

Flourless Mung Bean High-Protein Crackers
These flourless, high-protein crackers are made from soaked split mung beans, chia…

Marry Me Chickpeas with Spinach
A comforting Marry Me Chickpeas dish featuring chickpeas and spinach, made extra…

Flourless Red Lentil Seed Crackers
High Protein Flourless Red Lentil Seed Crackers are crispy, crunchy, and made…

High Protein Mung Bean Crackers
These Grain-Free Mung Bean Power Crackers are a high-protein snack that satisfies…

High-Protein Red Lentil Tomato Crackers
These flourless red lentil crackers are a wholesome, high-protein snack made with…

High Protein Lentil Quinoa Tofu Bake
Tired of flour leaving you bloated and sluggish? This High Protein Flourless…
High Protein Sweet Potato & Mung Bean Crackers
These crispy homemade crackers are made with wholesome ingredients like mung beans,…